


lei0.22
lei0.27
In stock

O varianta simplificata a jocului clasic Ping-Pong
 We deliver to lockers!
Pick up your orders anytime, hassle-free!
 Fast Delivery!
Orders placed by 2:00 PM are shipped the same day. Delivered within 24h!
 2-Year Warranty
Reliable products, worry-free!
 Easy 14-Day Returns
Unused items? No questions asked!
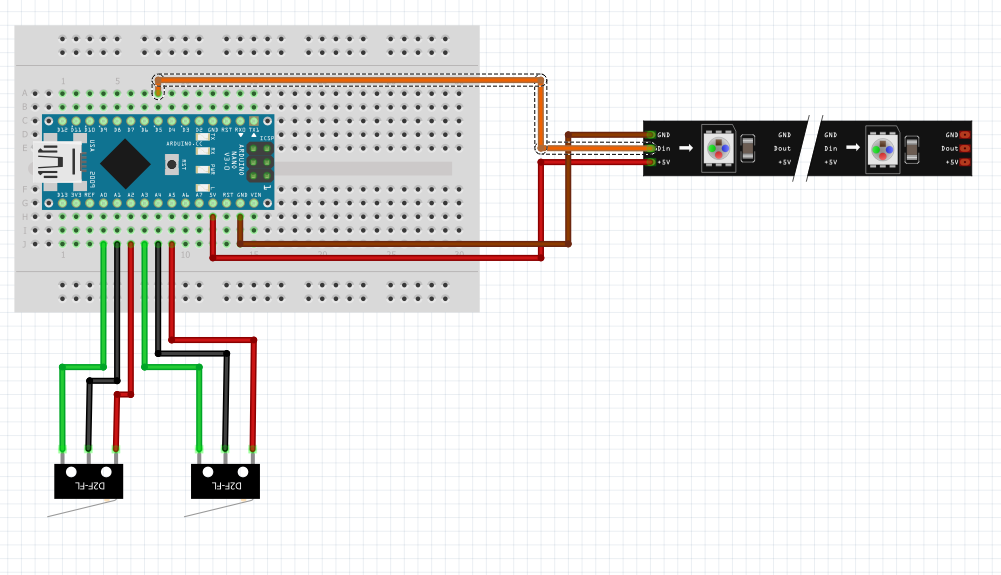
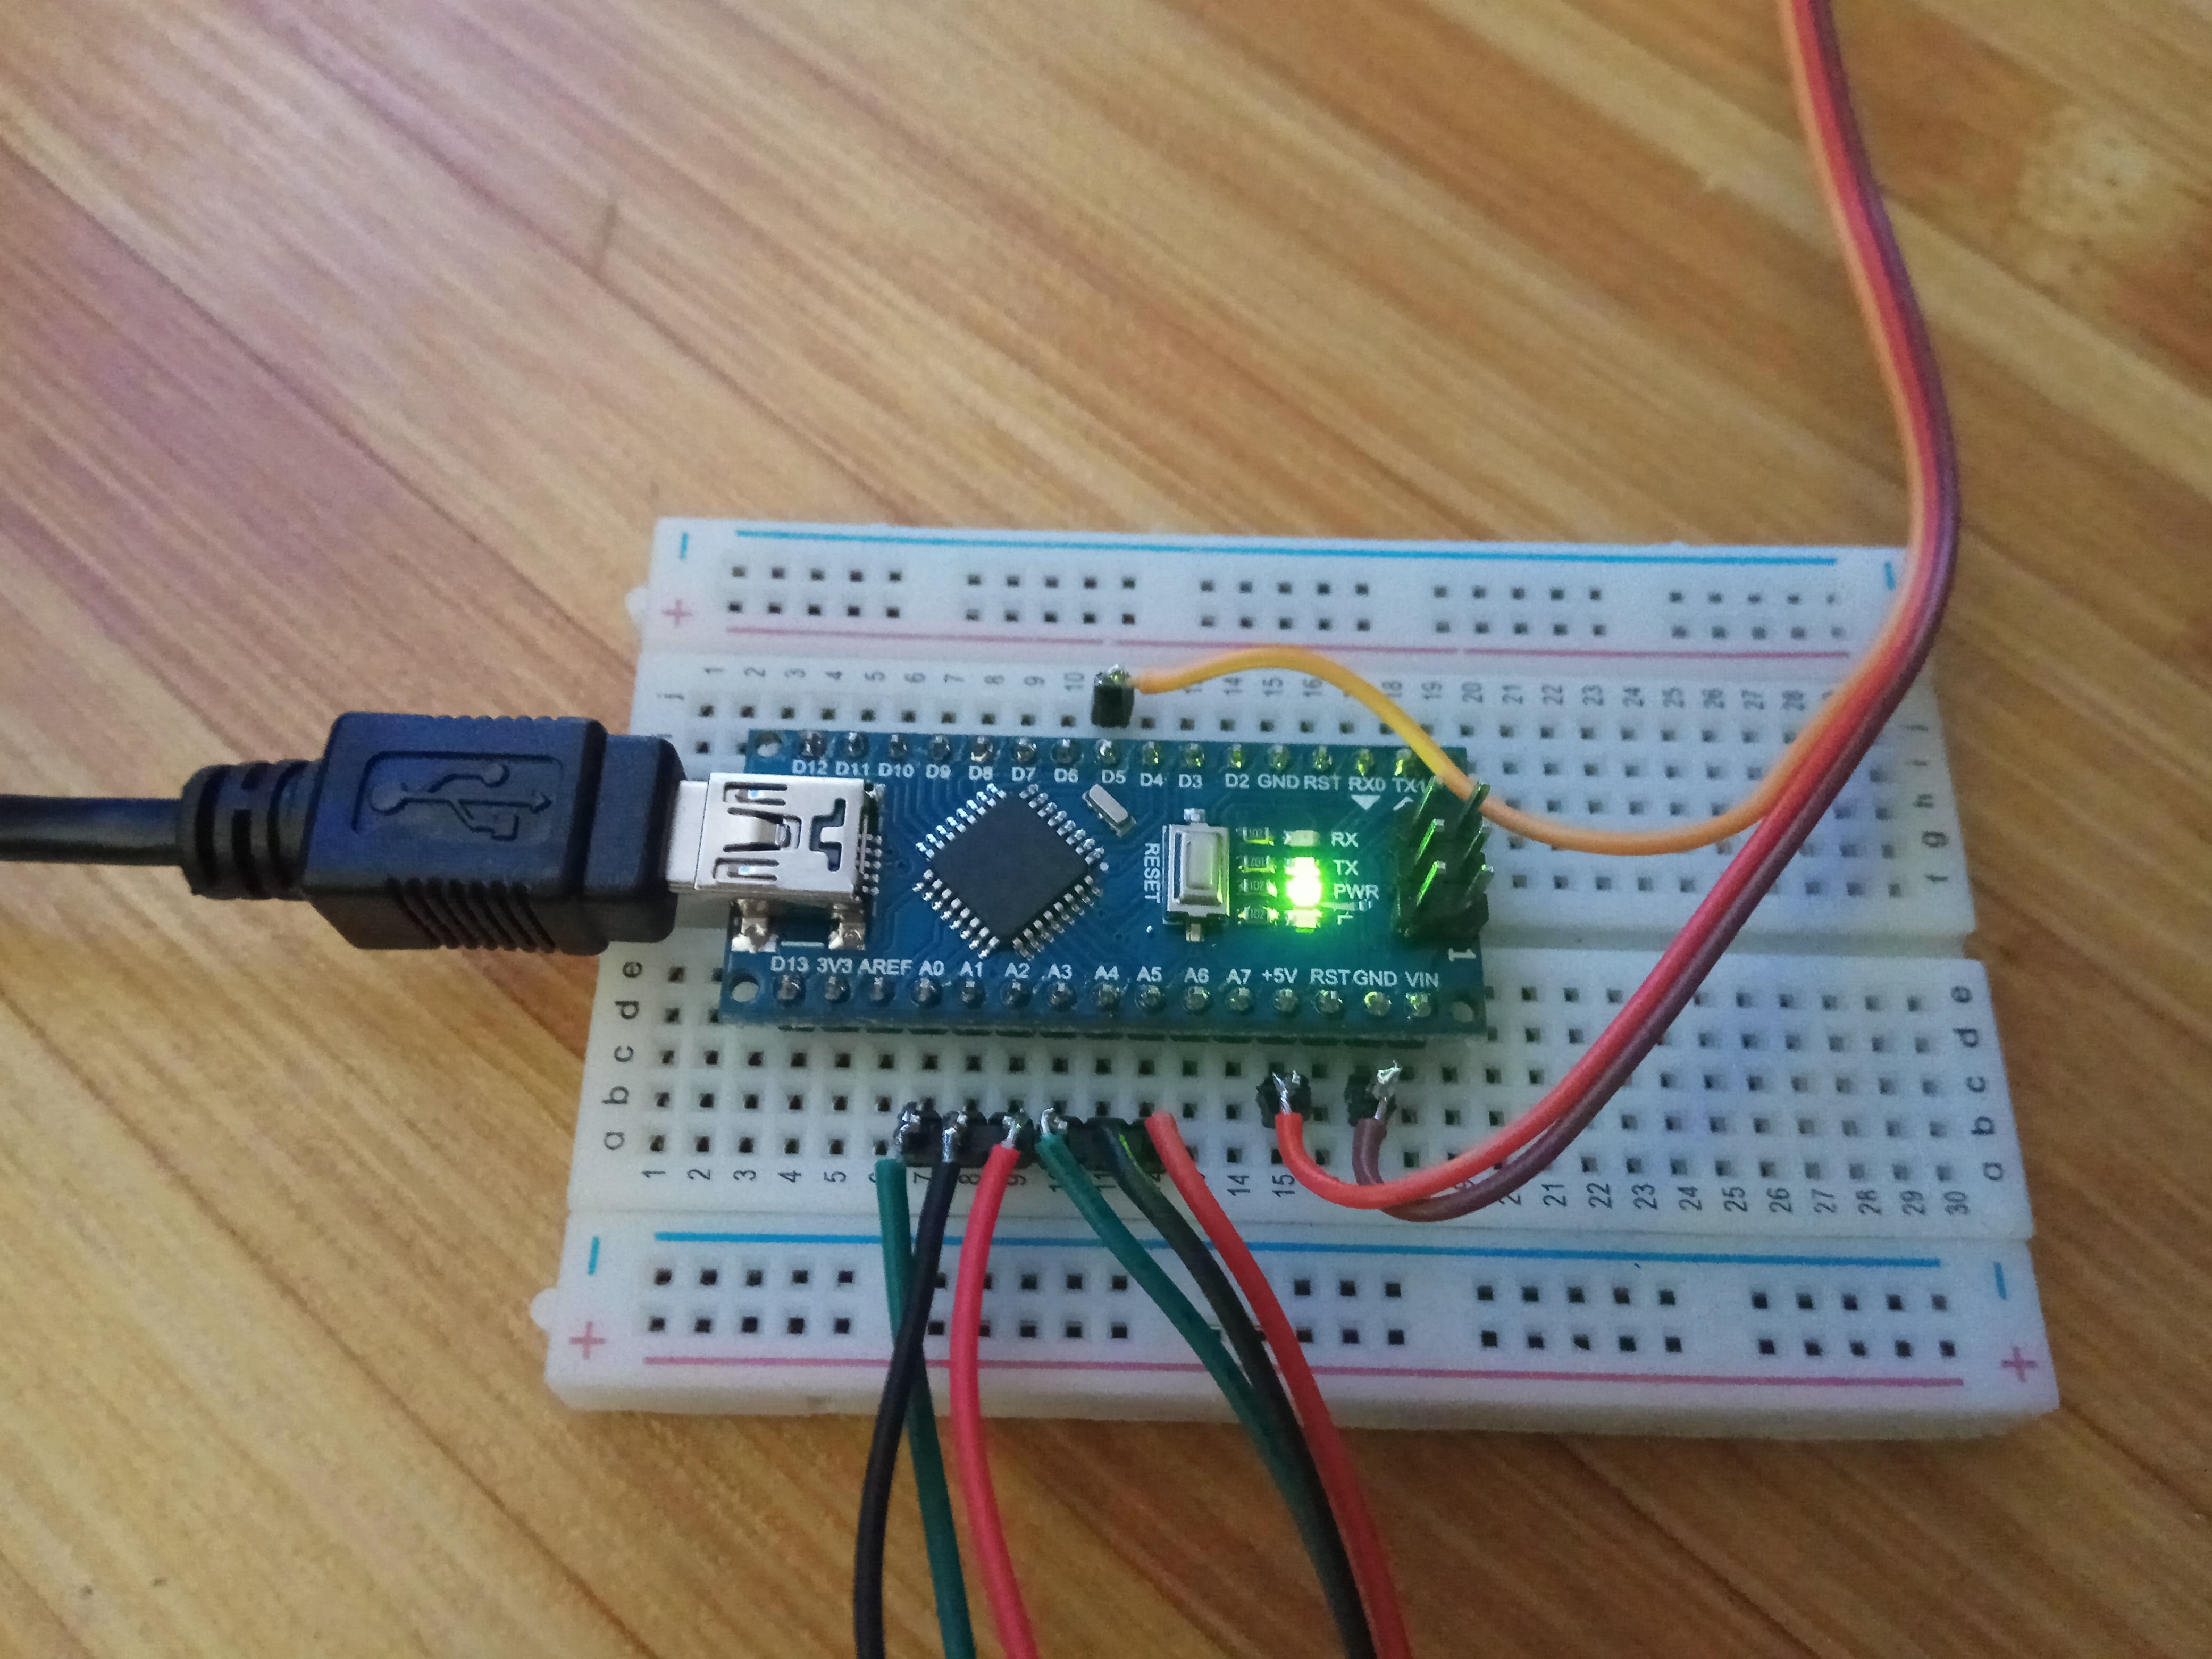
The kit includes the GroundStudio Jade Nano+ development board
Products created by GroundStudio are made using superior quality components, designed and assembled in Romania.
 |
 |
A Ping Pong game reduced to a single dimension, offered in kit form.
https://www.youtube.com/watch?v=VIZ4TcAcnhI
Kits are warranted for components, which must be measured and tested individually before assembly.
Since assembly is done by unauthorized personnel, under unknown conditions or in unknown stages of completion, we cannot assume any legal responsibility related to the operation of devices assembled by any third party.
ATTENTION!
Soldering of the pins is required! Optionally, we offer the possibility to perform the soldering for an additional cost.
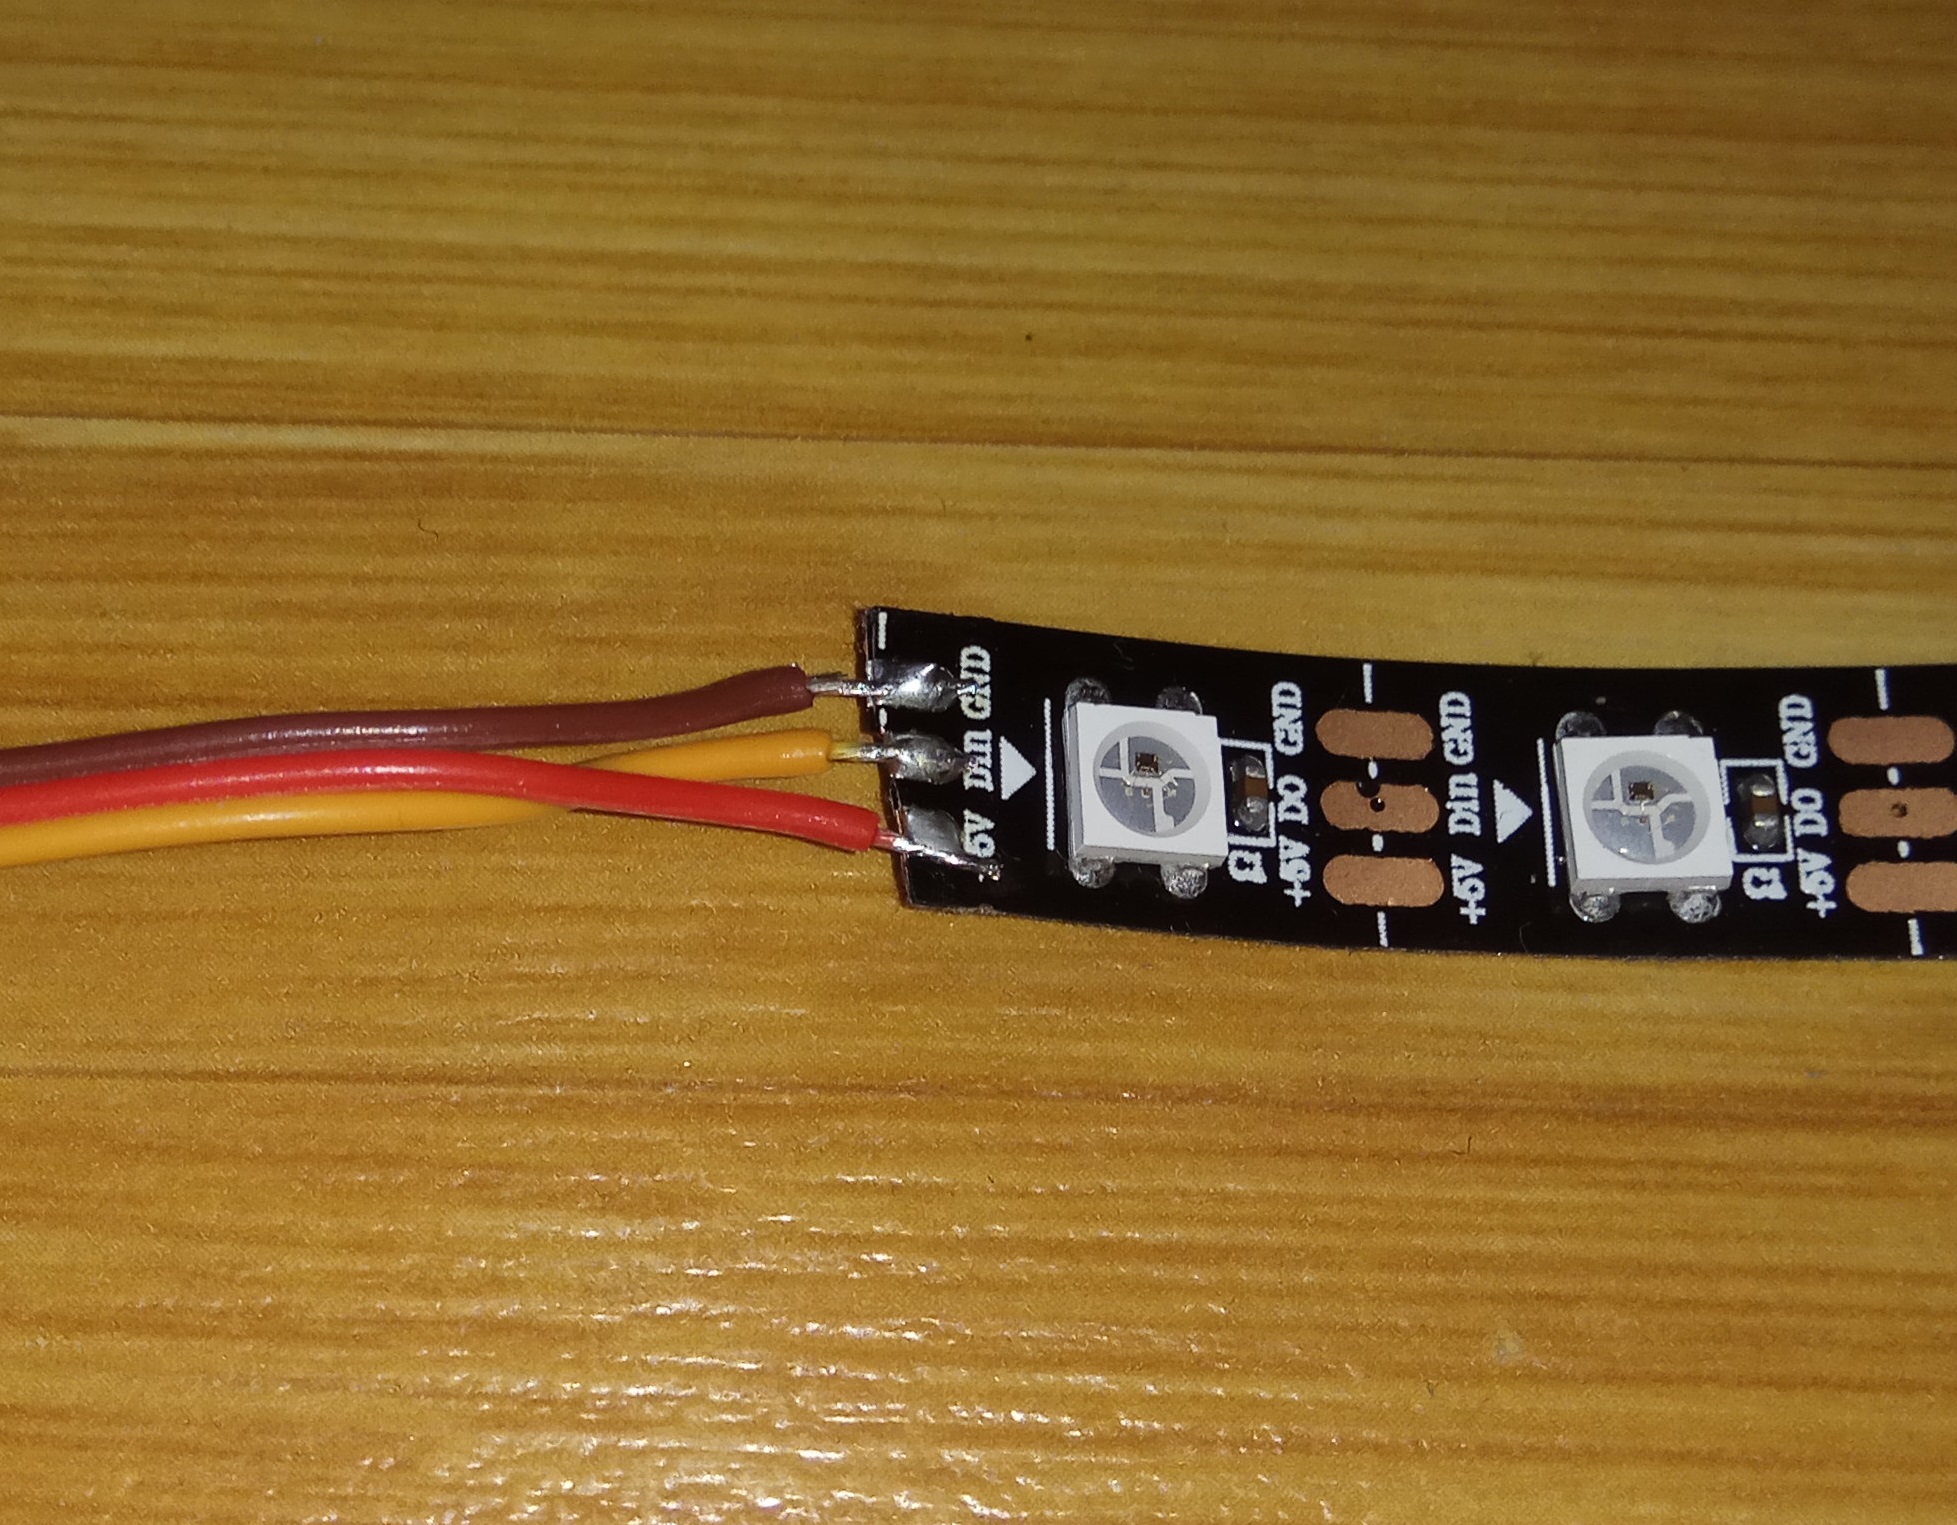
The endstops have a default "female" connector. These must be cut and the pins soldered as shown in the following picture.
Additionally, individual pins must be soldered to the end of the tricolor cable, and the opposite end soldered to the LED strip.
After mechanical assembly, it is necessary to upload the firmware.
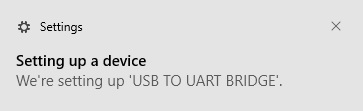
Jade Nano+ boards use the HT42B534-2 chip, which does not require the installation of an additional driver on any operating system (unlike other chips on the market (CH340, FTDI, etc.)).
Before connecting the board, start by downloading Arduino IDE 1.8.x from the link above according to your preferences and the operating system used.
After the initial connection via USB-C cable, the computer will attempt to find a compatible driver. In this case, it will connect directly to Windows using the HT42B534-2 chip because the drivers for it will install automatically.

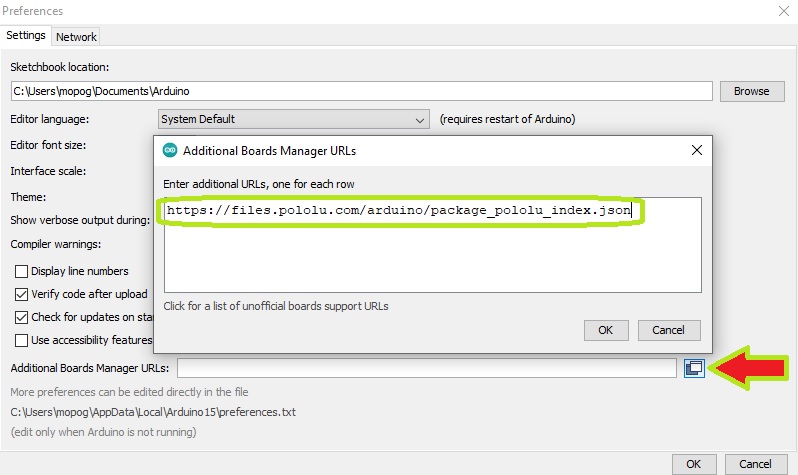
In "File->Preferences->Additional Boards Manager URLs:" add the following link: "https://files.pololu.com/arduino/package_pololu_index.json".
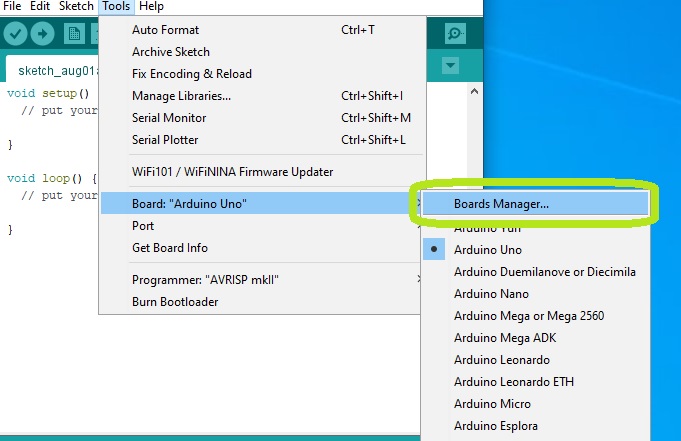
Access "Tools->Board->Boards Manager".
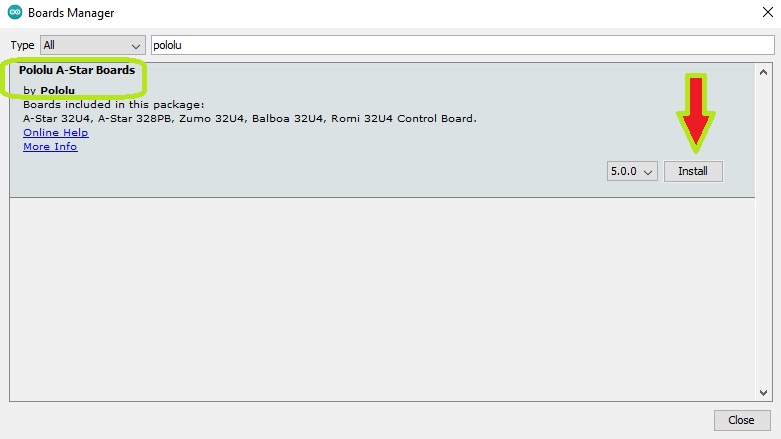
Search for the board set "Pololu A-Star Boards by Pololu" and install the latest version available.
After installation, you will have the "Pololu A-star 328PB" board available in the "Tools" menu.
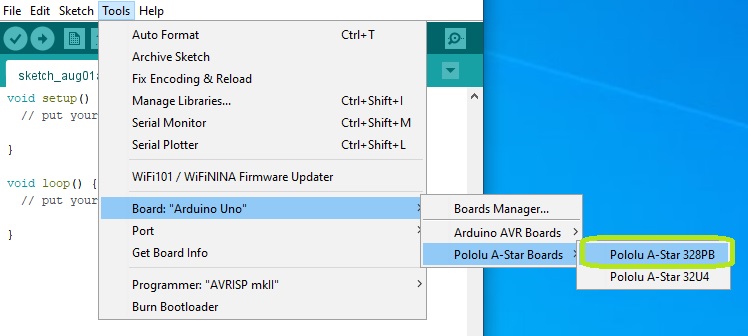
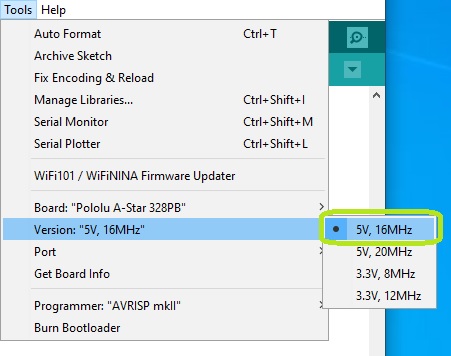
After selecting the board, a new section "Version" will appear in the Tools menu. Here you will need to select the option "5V, 16MHz".
Next, you need to tell the Arduino IDE which of your computer's serial ports the Jade Nano+ is connected to. To do this, go to "Tools" again, then select the COM port of the Jade Nano+.
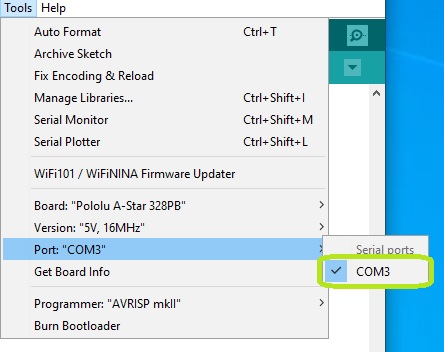
If you have multiple ports and are unsure which one is the Jade Nano+, disconnect it for a moment and check the "Ports" menu in "Device Manager" to see which one disappears.
After installation, download the firmware from the "Downloads" section and open the file pong3.ino in Arduino IDE.
To upload, click the right arrow in the top left corner (Upload).
The LEDs on the board should blink, and the screen should display "Upload complete".
ATTENTION - The computer does not provide sufficient current for the normal operation of the game.
After writing the firmware, the board must be disconnected from the PC and the USB cable connected to the 5V3A power source.
Otherwise, the LED strip will not be properly lit, and there is also a chance that the game will reset randomly.
The game is simple; each player has a single button that must be pressed.
Initially, it starts in demo mode, where the ball moves from one side to the other.
On the first click, the player who clicked serves, with the ball moving quickly to their serving area.
On the next click, the ball moves towards the opposite end of the strip at a speed proportional to how close to the end the ball was caught.
The other player must click only when the ball is in their field (delimited by an LED of their color), thus changing the direction and speed of the ball.
Any player loses if they click when the ball is out of their field or if the ball reaches the end.
In the future, we will offer more firmware variants with different rules.
1x [PGIGAD_BB-400] Breadboard 400
2x [ZWQINU_ES-M-01] Mechanical endstop for REPRAP printers
90x [POGXAB_WS2812B-strip-60] RGB LEDs on strip (Neopixels) WS2812B - price is per LED (60)
1x [LSYFGR_male-pin-2.54-WHITE] 40-pin male header strip - colored - 2.54mm (White)
3x [FENJRP_servo-cable] Servo motor cable
1x [TESULC_PSU-5V-3A] 5V 3A power supply
1x [HQJOOA_USB-C-1m] 1m black USB-A to USB-C cable
1x [RZLLCW_GS] GroundStudio Jade Nano+
Specific References
Your review appreciation cannot be sent
Report comment
Report sent
Your report cannot be sent
Write your review
Review sent
Your review cannot be sent
check_circle
check_circle